- Mark as New
- Bookmark
- Subscribe
- Mute
- Subscribe to RSS Feed
- Permalink
- Report Inappropriate Content
Hi everyone,
In my ongoing research into adaptations of the Action scripts supplied with the SDK (such as TrackingAction), I found a useful method for amplifying the distance that an object will travel when the hand or face landmark is moved. Previously, the best way to amplify movement was to chain two or more objects with identical TrackingAction configurations together in a chain of childed objects. This can impact on performance though if you have too many TrackingActions running simultaneously.
I would recommend creating more than one copy of the TrackingAction script, so that you can give the amplified movement to objects that really need it, whilst the rest of your project's TrackingAction-powered objects remain unaffected by the change. Here's a link to my guide on creating multiple numbered Action scripts.
https://software.intel.com/en-us/forums/realsense/topic/549805
Now, here's how to edit the TrackingAction for amplified movement.
STEP ONE
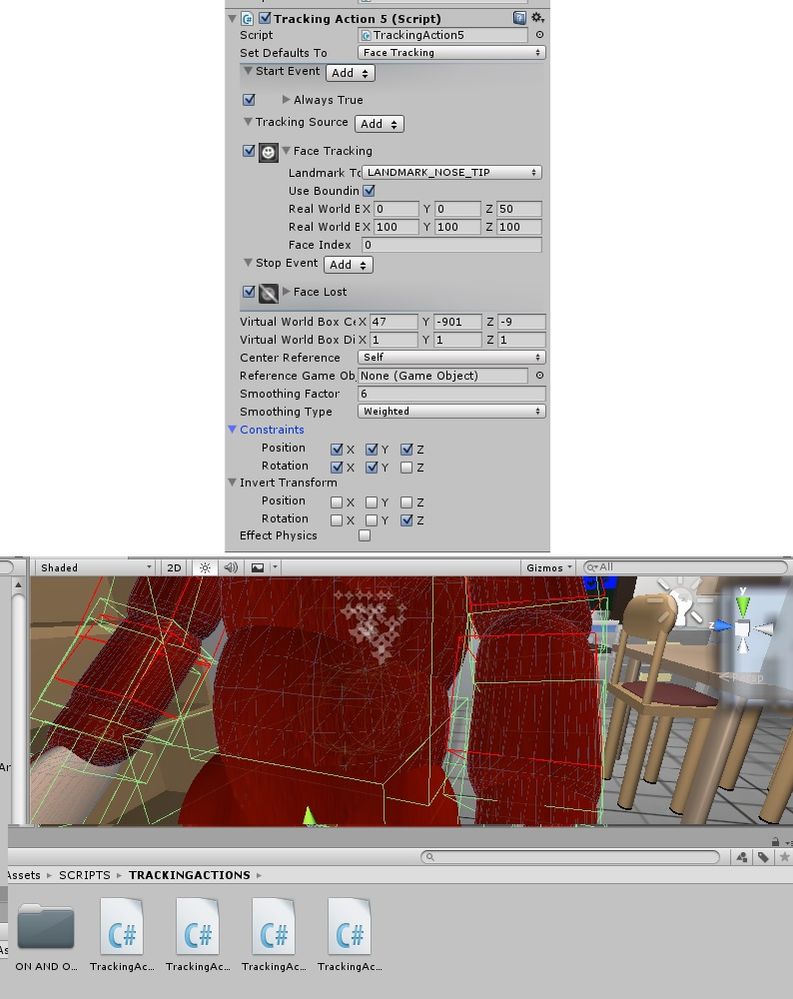
Place the TrackingAction that you are going to edit into your object. In my project I have five separate copies of the TrackingAction, numbered 1 to 5. I am using TrackingAction5 for the object that will be amplified. I am using it in the waist joint of my full-body avatar, so that it can fully bow down when the user's head is lowered instead of just leaning forwards slightly. Whilst the legs can already bend down when the head is lowered, we ideally want to couple that with a full body bow so that users can pick up objects from the floor if they have dropped them from the avatar's openable and closeable hand grip.
STEP 2
Open the TrackingAction to be edited in Unity's script editor. You can do this by double left-clicking on the TrackingAction script file. Scroll down to lines 241-243 to see the following block of code:
eulerAngles.x = -eulerAngles.x;
eulerAngles.y = -eulerAngles.y;
eulerAngles.z = -eulerAngles.z;
These lines determine the basic direction of rotation of an object when moving it with the hands or face. If you were to remove the minus signs from the eulerAngles statements on the right hand side (so that for example, elerAngle.x = eulerAngle.x) then the direction of rotation would be reversed from its normal state when you ran your project.
STEP THREE
Statements where you are setting the value of a variable (such as one called 'eulerAngles.x') can have their value changed by adding mathematical symbols onto the end of the statement, such as * to multiply the value, + to add onto it, - to subtract from it and / to divide it. In the case of our TrackingAction, adding or subtracting from it would accelerate or decelerate object movement by a small amount, whilst multiplying or dividing would likely greatly increase acceleration or deceleration.
In the case of my project, I needed to amplify the movement of the waist joint a lot so that the upper half of the avatar body could bend down as far as human-like anatomy would allow. So multiplication ( * ) was the natural choice of sum to use.
As my waist joint bent using the Z direction, I needed to add a multiplication sum to the end of the 'eulerAngles.Z' statement that handles rotational movement in the Z axis.
Through trial and error testing, I found that '6' was the optimum multiplication value that allowed the avatar to fully bow down without bending so far that it was anatomically unrealistic and made the joint prone to error. So '*6' was simply added to the end of the second half of the Z statement.
eulerAngles.x = -eulerAngles.x;
eulerAngles.y = -eulerAngles.y;
eulerAngles.z = -eulerAngles.z*6;
It is worth bearing in mind that if you want to develop your project in a non-Unity environment such as Visual Studio then the principle of using multiplication statements with angle formulas should also work there as well.
STEP SEVEN
When you accelerate a RealSense-controlled object in Unity, it is often a good idea to give that object a higher 'Smoothing' value to smooth out the bumps in movement that the greater speed of travel can cause. Again through trial and error, we found that increasing the waist joint's weighting from '4' to '6' provided the ideal balance of a smooth bow that did not take long to complete.
Best of luck, and please feel free to ask questions in the comments section below!
Link Copied
- Mark as New
- Bookmark
- Subscribe
- Mute
- Subscribe to RSS Feed
- Permalink
- Report Inappropriate Content
Further research identified the line of TrackingAction code to change to alter the strength of Position movement, at line 290:
Vector3 vec = trgr.Position;
By placing a sum on the end of the 'trgr.Position' statement, you can reduce or amplify the speed of a TrackingAction-controlled object's position-based travel.
For example, to multiply an object's speed by 3x, we added the following multiplication sum to the end of the line:
Vector3 vec = trgr.Position*3f;
Remember to put an f on the end of the value that you use so that the C#-based TrackingAction script recognizes the number as a 'float value' (f for float), otherwise you will get a red error if you use a decimal number value without an f on the end of it.
A particular advantage of multiplying a Position-based object's speed is that if you have defined a tall / wide Virtual World Box, it makes it easier for the object to reach the defined limits of its Box before the user's hand goes outside of the camera's field of view and the object's motion stalls.
- Subscribe to RSS Feed
- Mark Topic as New
- Mark Topic as Read
- Float this Topic for Current User
- Bookmark
- Subscribe
- Printer Friendly Page


