- Mark as New
- Bookmark
- Subscribe
- Mute
- Subscribe to RSS Feed
- Permalink
- Report Inappropriate Content
I have reimaged my PC with a clean install of Windows 10 21H1.
After the reimage XTU seems to be unable to change any Core Ratios (package or per-core) or voltages (package or per-core). It was able to do this before the reimage.
When I open XTU, it lets me make changes to everything via the UI and I can save profiles, as needed. However when I make a change and click Apply, the change item changes from yellow to blue, but the change does not really happen.
The monitor shows that the old values are still being used. The 'Active' column in the right-hand pane show the changed values, so XTU thinks that it has made the change, but apparently the hardware/BIOS did not accept the changes.
Changes made via the BIOS work OK.
To my knowledge, I have the latest versions of all drivers and the latext XTU.
Anyone have any ideas about what might be blocking these changes? (System config, below.)
ASUS Rampage VI Extreme Omega
Intel Core i9 9980XE
G.Skill Trident-Z F4-4000C18-8GTZKK 64GB (8x8) (XMP 4000 @ 1.35V @ 18-19-19-39)
380GB Intel Optane 905P SSD (boot), 2TB Intel 660P SSD (data), 8TB WD MyBook (ext backup)
EVGA GeForce GTX 1080TI Black Edition and Dell U3011 monitor (30")
Silverstone Strider Gold 1200W PSU in Silverstone TJ11 case
Windows 10 Pro, 64-bit
HWLabs Black Ice Nemesis GTX360
Noctua NF-F12 iPPC 2000rpm 120mm push-pull
EK Velocity CPU WB
EK XTOP Revo D5 pump
EK DBay Spin Res
EK fittings & Phobia sensors
Link Copied
- Mark as New
- Bookmark
- Subscribe
- Mute
- Subscribe to RSS Feed
- Permalink
- Report Inappropriate Content
Hello Dobratz__Glenn
Thank you for posting on the Intel️® communities.
To take a better look at your system, please provide the Intel® System Support Utility (Intel® SSU) results
- Download the Intel SSU https://downloadcenter.intel.com/download/25293/Intel-System-Support-Utility-for-Windows-
- Open the application and select "Everything" click on "Scan" to see the system and device information. By default, Intel® SSU will take you to the "Summary View".
- Click on the menu where it says "Summary" to change to "Detailed View".
- To save your scan, click on "Next", then "Save".
Please share with us the following information:
- Did you re-install the OS using a fresh image? (not used before)
- Did it work properly before the reinstallation?
- Do you have XMP enabled? Do you see the same behavior if you disable it?
- Did you check the BIOS settings are correct?
- Please provide the XTU version used
- Please share a video with us or a detailed step by step guide to reproduce this issue.
Regards,
David G
Intel Customer Support Technician
- Mark as New
- Bookmark
- Subscribe
- Mute
- Subscribe to RSS Feed
- Permalink
- Report Inappropriate Content
"Did you re-install the OS using a fresh image? (not used before)" - As stated in original post, Yes.
"Did it work properly before the reinstallation?" - As stated in original post, Yes.
"Do you have XMP enabled? Do you see the same behavior if you disable it?" Yes I am using XMP to set memory to 4000MHz @ 1.35V to match the memory that I am using. I have booted without XMP enabled, but cannot say for sure that if I used XTU on those boots.
"Did you check the BIOS settings are correct?" - As best I can tell they are. I also tried setting most of the BIOS settings to Auto (except XMP).
"Please provide the XTU version used" - 7.3.0.33
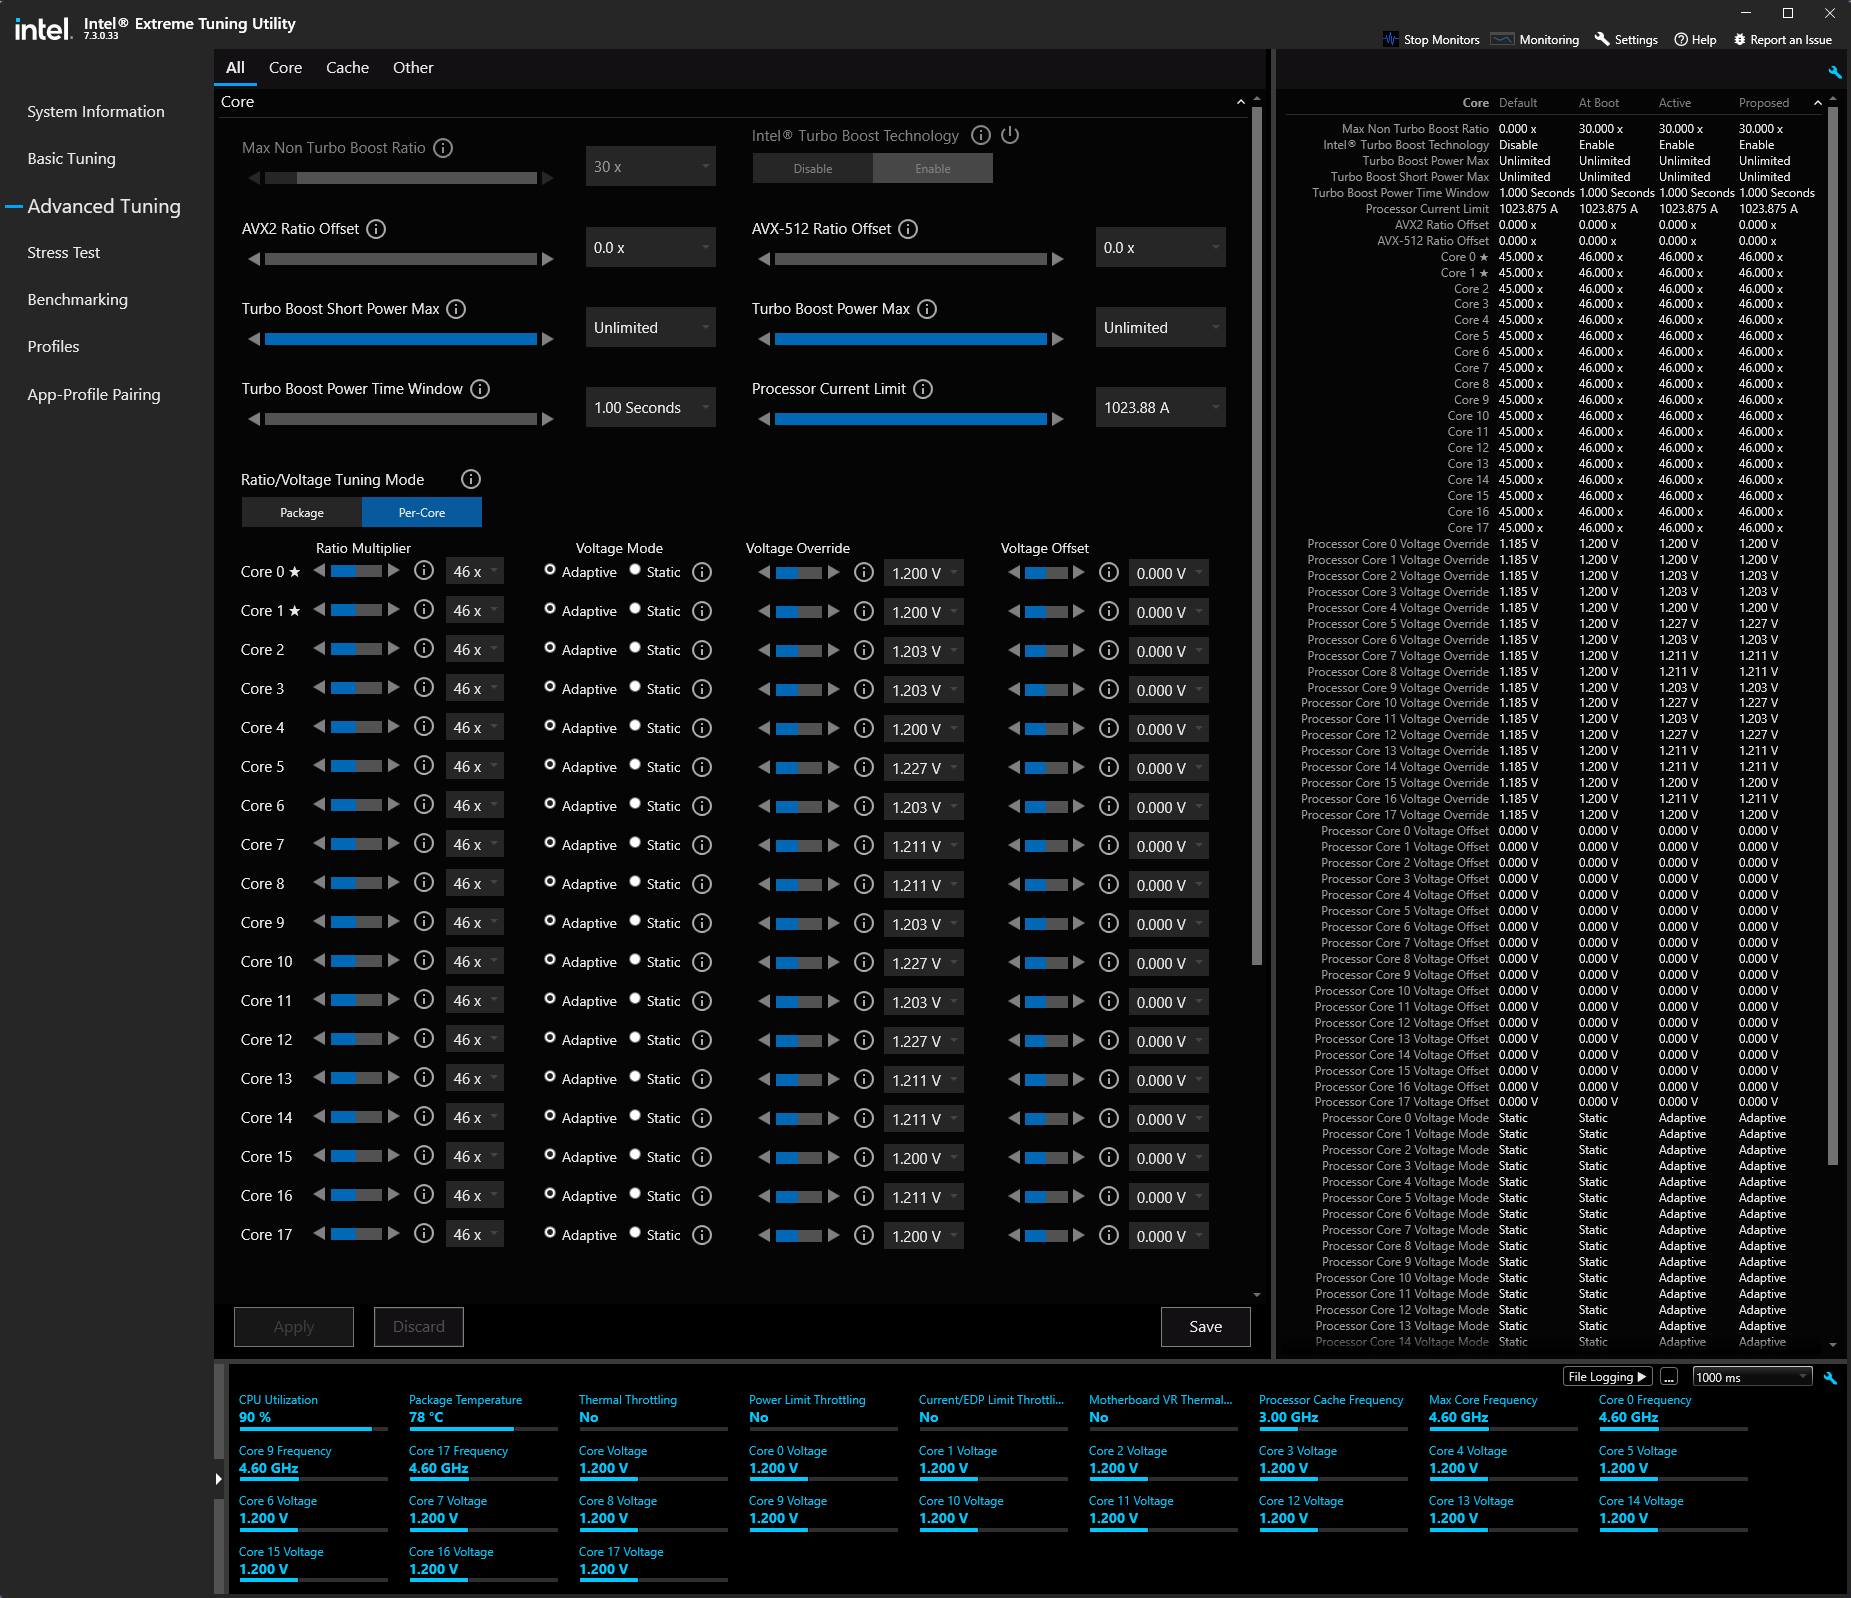
I have attached the requested scan from SSU and a screen shot of my 'At Boot' settings in XTU (under load). The 'At Boot' column shows that I am overclocking to 4.6GHz, but the problem also happens using BIOS's default 'auto' settings.
Since my original post I have discovered that XTU behavior is actually slightly different than I originally stated:
I have noticed that if I change a Core Ratio (either package or per-core) or Voltage Override (again, either package or per-core), the change DOES take place if the system happens to be under heavy load at the time, however the change will revert to the value shown in the 'At Boot' column of the right-hand pane when the system becomes idle or lightly loaded. After reverting, it never returns to the changed value; it stays at the 'At Boot' value forever (until changed again).
To reproduce:
- Start XTU and note the 'At Boot' value for the per-core ratio that will be modified. Ensure that that ratio is being shown in the monitor section.
- Start any application that will provide a heavy load to all cores.
- Modify the per-core ratio (while heavy load is active) to a value higher than the 'At Boot' value and click Apply. Note that the modified ratio shows the new value in the monitor section.
- Stop the application that is generating the load so the system becomes idle. In the monitor, the modified ratio will change to some value at or below the 'At Boot' value.
- Restart the loading application. Note in the monitor section that the modified ratio only returns to the 'At Boot' value, not the modified value.
- Mark as New
- Bookmark
- Subscribe
- Mute
- Subscribe to RSS Feed
- Permalink
- Report Inappropriate Content
One additional note that might not have been clear in my original post:
This problem occurred after the clean install of Windows 10 21H1, as I stated.
The version where XTU was working properly was and installation Windows 10 2004 that had been working normally for several years (in various levels of WIndows Updates).
- Mark as New
- Bookmark
- Subscribe
- Mute
- Subscribe to RSS Feed
- Permalink
- Report Inappropriate Content
Thank you for the information provided.
Let us know if you have any other overclocking application installed and please update the Intel® Extreme Tuning Utility (Intel® XTU) to the latest version (7.4.0.26
As a friendly reminder, we need the Intel® System Support Utility (Intel® SSU) results for more recommendations.
Regards,
David G
Intel Customer Support Technician
- Mark as New
- Bookmark
- Subscribe
- Mute
- Subscribe to RSS Feed
- Permalink
- Report Inappropriate Content
I upgraded XTU to the requested version 7.4.0.26. Same result.
Some additional information: If I set a ratio below the 'At Boot' value, that seems to work and the value persists after the PC goes idle and then returns to load.
The failure only occurs when setting a ratio/voltage above the 'At Boot' value.
"As a friendly reminder, we need the Intel® System Support Utility (Intel® SSU) results for more recommendations"
This information was included in my earlier post (dx_info_6122.txt). Did it not get uploaded properly?
- Mark as New
- Bookmark
- Subscribe
- Mute
- Subscribe to RSS Feed
- Permalink
- Report Inappropriate Content
Sorry, I forgot to answer your last post's question:
No, XTU is the only overclocking software that I am using.
I do have HWInfo64 installed. I have been using it to confirm the values that the XTU monitor is showing me.
- Mark as New
- Bookmark
- Subscribe
- Mute
- Subscribe to RSS Feed
- Permalink
- Report Inappropriate Content
The file attached (dx_info_6122.txt) includes the DxDiag results only, we need the SSU results to continue with the investigation. To get the Intel® SSU results:
- Download the Intel SSU https://downloadcenter.intel.com/download/25293/Intel-System-Support-Utility-for-Windows-
- Open the application and select "Everything" click on "Scan" to see the system and device information. By default, Intel® SSU will take you to the "Summary View".
- Click on the menu where it says "Summary" to change to "Detailed View".
- To save your scan, click on "Next", then "Save".
Regards,
David G
Intel Customer Support Technician
- Mark as New
- Bookmark
- Subscribe
- Mute
- Subscribe to RSS Feed
- Permalink
- Report Inappropriate Content
I redid the scan as requested, but the new file is the essentially the same size as the previous one.
But here it is, as requested.
- Mark as New
- Bookmark
- Subscribe
- Mute
- Subscribe to RSS Feed
- Permalink
- Report Inappropriate Content
Thank you for the information provided Dobratz__Glenn. We are working on this request, the updates will be posted on the thread.
Regards,
David G
Intel Customer Support Technician
- Mark as New
- Bookmark
- Subscribe
- Mute
- Subscribe to RSS Feed
- Permalink
- Report Inappropriate Content
After verifying the information provided and completing our tests, we did not get the same result. We recommend that you uninstall the software completely, reinstall again, test and check with the OEM for additional steps if necessary, as this could also indicate a hardware limitation (hardware does not accept XTU changes).
Regards,
David G
Intel Customer Support Technician
- Subscribe to RSS Feed
- Mark Topic as New
- Mark Topic as Read
- Float this Topic for Current User
- Bookmark
- Subscribe
- Printer Friendly Page