- Mark as New
- Bookmark
- Subscribe
- Mute
- Subscribe to RSS Feed
- Permalink
- Report Inappropriate Content
On Ubuntu 16, I can start jtagd on the command line and quartus 18 can use usb blaster, but when quartus starts jtagd itself, it can't communicate with usb blaster. When I ps -ef | grep jtagd, the only difference is the working case has a tty, and the failing case has "?" for the tty. Both have the same owner. The only difference on the command line is when manually started I added --foreground --debug. Any ideas?
Link Copied
- Mark as New
- Bookmark
- Subscribe
- Mute
- Subscribe to RSS Feed
- Permalink
- Report Inappropriate Content
Hi MJone16,
Can you provide some steps and screen shots to explain the failure that you are seeing? I'm not sure if I understand on what you are trying to do here. Thank you.
Regards,
Nooraini
- Mark as New
- Bookmark
- Subscribe
- Mute
- Subscribe to RSS Feed
- Permalink
- Report Inappropriate Content
1) Open Quartus 18 on Ubuntu 16
2) Open a design
3) Open programming tool
4) Select USB Blaster
5) Hit program button
6) It will eventually timeout after a long time
7) Close the tools
8) killall -9 jtagd
9) Start jtagd manually
10) Back to step one
11) At step 5 it will work
- Mark as New
- Bookmark
- Subscribe
- Mute
- Subscribe to RSS Feed
- Permalink
- Report Inappropriate Content
Hi MJone6,
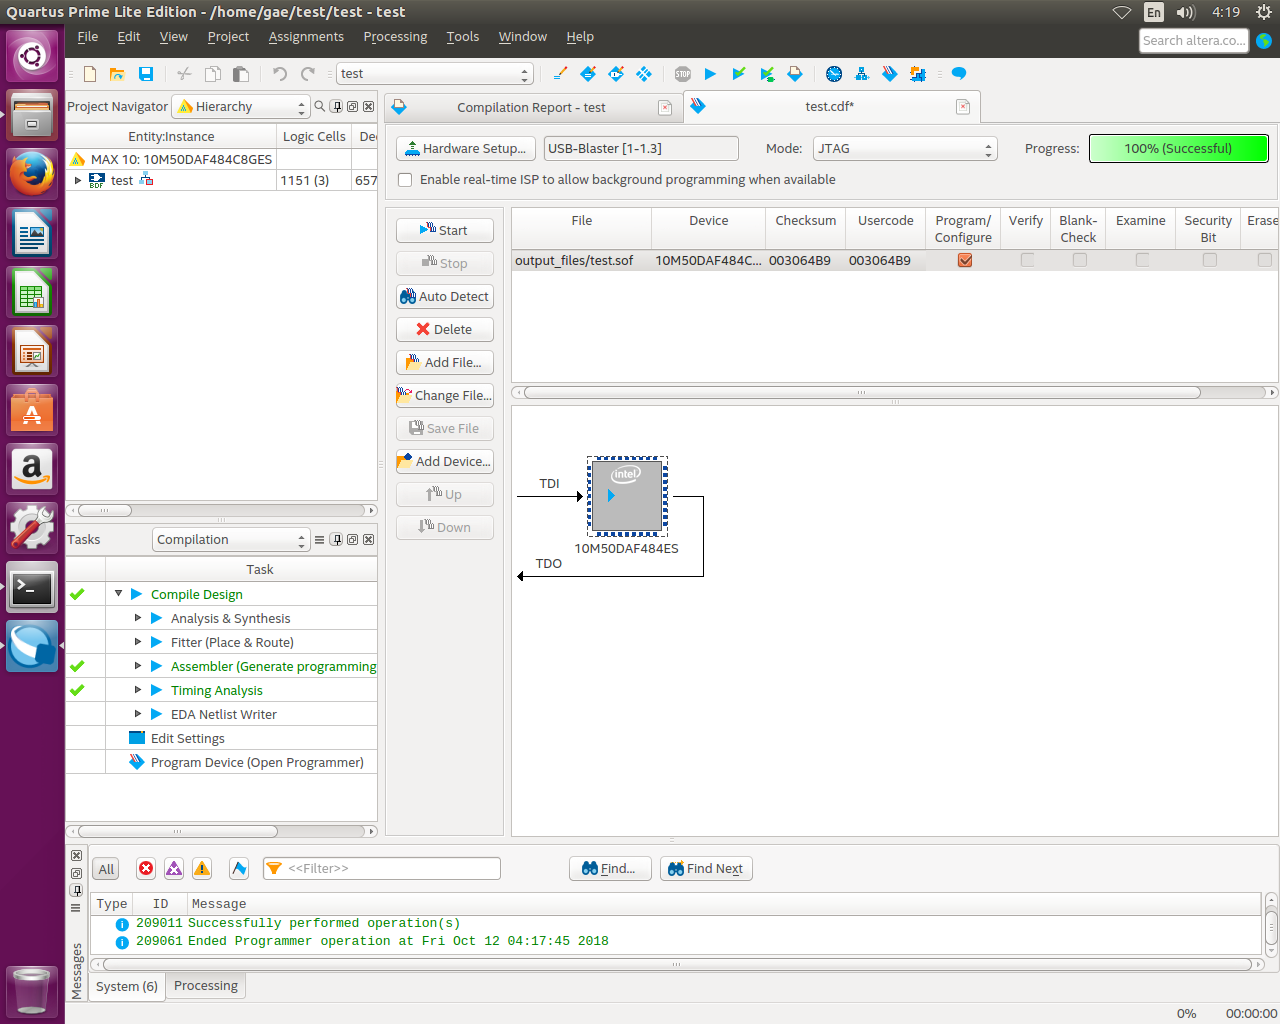
Apologize for the delay response. I needed time to find a machine that I can install Ubuntu 16 as all the machines here Windows OS. So, I managed to installed Ubuntu 16, then Quartus Lite v18.0 tools and the USB Blaster driver. After the installation I restart the machine.
1) Open Quartus 18 on Ubuntu 16
2) Create a new project design --> Compile to generate a .sof file
3) Open Programming tool
4) Select USB Blaster
5) Perform auto-detect --> Successfully detect MAX 10 device on the dev kit
6) Add .sof file into the programmer
7) Click start --> Programming start until progress bar show 100% success
I'm not able replicate the issue that you are seeing. Can you provide some screen shot showing the issue?
Regards,
Nooraini
- Mark as New
- Bookmark
- Subscribe
- Mute
- Subscribe to RSS Feed
- Permalink
- Report Inappropriate Content
- Subscribe to RSS Feed
- Mark Topic as New
- Mark Topic as Read
- Float this Topic for Current User
- Bookmark
- Subscribe
- Printer Friendly Page